Search Here

Showing posts with label Blogger/Website. Show all posts

How To Remove blog Tital from Blog Posts in Blogger

Now Remove Blog Tital from the posts of blog it Help to improve SEO of a Blog

Menu->Template -> Edit HTML.

2.Find the string<title><data:blog.pageTitle/></title>
3.Replace it with:
<b:if cond='data:blog.pageType == "index"'>
<title><data:blog.title/></title>
<b:else/>
<title><data:blog.pageName/></title>
</b:if>
4.Click theSave Templatebutton. Done!
0

How To Add Facebook Like Box Plugin For Blogger or Websites

As We know Facebook is best social media platform for connecting with people. Facebook helps to increase Business clients and also visitor on your website or Blog. So Facebook Pages are best place for sharing latest updates or our product and services with our user. Facebook pages work as a community which helps everyone for building and growing their business.
Placing Social Like Box of Facebook on your Blog or website is a best idea for our users to lets them join your Facebook page also. So here i am going to start with my First article related to widget for blogger. So Today i decide to change the niche of our blog towards blogging also. From Today onwards i will start sharing the customize widget and plugins for Blogger, Website and WordPress also.


Install Facebook Like Box on Blogger


Here i am to start with the simple steps of installing Facebook like box on you blogger blogs.

  • Firstly Go to your Blogger Dashboard >> Then Layout
  • Click on The Add a widget >> Edit HTML/JavaScript
  • Now simple Copy the Below Given code 
  • Replace SafeTricks with username of your page.


<iframe src="//www.facebook.com/plugins/likebox.php?href=https%3A%2F%2Fwww.facebook.com%2FSabKuchHai&amp;width=292&amp;height=590&amp;show_faces=true&amp;colorscheme=light&amp;stream=false&amp;show_border=true&amp;header=true&amp;appId=204979396325520" scrolling="no" frameborder="0" style="border:none; overflow:hidden; width:292px; height:590px;" allowTransparency="true"></iframe>


  • Now Place this code in HTML box and Save it.

For Manually Customizing Of This Facebook Box.


If you want to change the look and feature to Facebook box manually then simple change the below code as mention.

  • If you want to change the width and Height of Box Then search for width=292 And height=590 with your values.
  • If you  want To Recent Post of your page Then search Stream=false and change false into True.
  • If you don't want to show the Faces then change  show_faces=true value in False.
  • If you want to show Header Part of Box Then change Header=true with False.

Now After Doing Manual changes Save Your box and You have done.

If you face any kind of problem while installing or doing any change with this box. Feel free to ask me in below comment.
0

How to change mouse cursor in blogger blog to animated cursors

How to change mouse cursor in blogger blog to animated cursors

How to change mouse cursor in blogger blog to animated cursors.One of the best way to add extra fun to your blog is, changing mouse cursor on your blog. Changing the mouse cursor in blogger or blogspot blogs is very easy.This tutorial will help you to change the mouse cursor of your blog to animated cursors.Many bloggers are asking such kind of questions but there is no tutorial available on the internet.I created this post because there are a blogger friend who asked how to change the pointer / cursor on the blogger. This you can do to decorate the look of blog.


Read More:
1. How To Add Snow Effect On The Blogger Mouse Cursor Area


I take the cursor image from http://www.cursors-4u.com and http://rw-designer.com you can change it anytime depends on your festive moods.


How to Install mouse cursor in blogger blog to animated cursors


How to add HTML-CSS-Javascript Codes to your Blog ?

This is very simple and easy you only follow below steps and add this widget in your blog.

Step 1 Log-in to your Blogger account.

Step 2 Backup your Template.


Step 3 Click on The Template>> Edit HTML>> Proceed.

Step 4 Now find [by pressing Ctrl + F ] this code in the template:

</head>

And immediately Before it, paste this code:


<link href="http://dl.dropboxusercontent.com/s/sjqjsg1hc0rodn5/everykindofhelp.blogspot.com-1.css" rel="stylesheet" type="text/css" /><a href="http://everykindofhelp.blogspot.com/" target="_blank" title="Blogger Templates"><img src="https://bitly.com/everykindofhelp1" alt="Blogger Templates" border="0" style="position:absolute; top: 0px; right: 0px;" ></a>


And now click Save Template


Change Mouse Cursor Generator by EveryKindOfHelp.blogspot.com

How To Add Mouse Cursor Widget To Blogger?

  • Choose a type of Mouse Cursor below
  • Click on "Genetate" button
  • Finally click on "Add to Blogger" to add it to your blog.
    Note We are going to add more cursor, cursor pointer, cursors, mouse cursor, Totally Free Cursors, Myspace Cursors, Animated Cursors and cursors oftenly so keep visiting this page.


    Blogger MySpace Cursor Code Generate


    You can change the appearance of the cursor on the MySpace profile page (the cursor is the little that moves on the screen by moving the mouse). For example, you could make the appearance of the cursor as a question mark when the user hovers over an object.The widget is originally developed by code-generator.net, i just changed something in the widget.
    How to Install Blogger MySpace Cursor Code Generator Widget

    Now let's start adding it...

    Step 1. Login to Your Blogger Account.Go to your Blogger Dashboard.Click on Layout tab from left pane and click on Add a Gadget link.


    Blogger Tips And Tricks|Latest Tips For Bloggers

    Step 2. After click on Add a Gadget link A pop-up box will open now
    with many gadget list, Choose HTML/JavaScript from the gadget options by clicking the blue plus sign for that gadget.


    Blogger Tips And Tricks|Latest Tips For Bloggers

    Step 3. Select 'HTML/Javascript' and add the one of code given below.

    Step 4. Now Click On Save 'JavaScript' You are done.
0

Changing Font Size in the Header Bar in Blogger's Dynamic View Templates

Changing Font Size in the Header Bar in Blogger's Dynamic View Templates

Before
After
You'd think there is an easy way to change the size of the font on your Dynamic View's header bar. Oh wait, there is - the option to change your font size is very much there in your Template Designer (under Advanced - Header Bar). But let's be honest here. I have not seen this working. It never had any effect on my actual template, and no, not even on my preview page. Fortunately, there's a way to manually change the font size in the header bar, and here's how.


Go to Template Designer - Advanced - Add CSS - paste the following code - Press enter after the last character of the last line } - Apply to Blog:

Use the following to change the size of your menu font (Classic, Flipcard, Magazine..)
.header-drawer .menu span{
font-size: 20px !important;
}
And the following to change the size of your header bar links.
.header-drawer .tabs{
font-size: 20px !important;
}
And this to change the font-size of the view-options in your drop down menu:
#views .menu-item{
font-size: 20px !important;
}
Change the value '20px' in Line 2 accordingly.
0

Comment Link Next to Blogger Post Title

Comment Link Next to Blogger Post Title

Before
After
Finally, a non-dynamic post after a long time (or I should say, a *post* after a long time).. Knowing there's a way to add labels next to post titles, blog reader Amy was curious to know if there's a way to do the same with Comment links - adding the link next to the title, including the comment counter.. Since this doesn't involve a Dynamic template, you have all the reason in the world to believe there must be a way. Personally, I think this tweak could be especially handy, now that the comment link in post footer is more of a hit-and-miss thing. Without further ado, here's how..


Step 1:

Backup your template by going to Dashboard - Template - Backup/Restore - Download Full Template. Next, go to Dashboard - Template - Edit HTML - Find and delete the following lines:

<b:includable id='post' var='post'>
  <div class='post hentry' itemprop='blogPost' itemscope='itemscope' itemtype='http://schema.org/BlogPosting'>
    <b:if cond='data:post.firstImageUrl'>
      <meta expr:content='data:post.firstImageUrl' itemprop='image_url'/>
    </b:if>
    <meta expr:content='data:blog.blogId' itemprop='blogId'/>
    <meta expr:content='data:post.id' itemprop='postId'/>

    <a expr:name='data:post.id'/>
    <b:if cond='data:post.title'>
      <h3 class='post-title entry-title' itemprop='name'>
      <b:if cond='data:post.link'>
        <a expr:href='data:post.link'><data:post.title/></a>
      <b:else/>
        <b:if cond='data:post.url'>
          <b:if cond='data:blog.url != data:post.url'>
            <a expr:href='data:post.url'><data:post.title/></a>
          <b:else/>
            <data:post.title/>
          </b:if>
        <b:else/>
          <data:post.title/>
        </b:if>
      </b:if>
      </h3>
    </b:if>

Screenshot of the lines to be deleted:


Step 2:

Copy and paste the following lines in place of the deleted lines in Step 1, then click on 'Save Template'.
<b:includable id='post' var='post'>
  <div class='post hentry' itemprop='blogPost' itemscope='itemscope' itemtype='http://schema.org/BlogPosting'>
    <b:if cond='data:post.firstImageUrl'>
      <meta expr:content='data:post.firstImageUrl' itemprop='image_url'/>
    </b:if>
    <meta expr:content='data:blog.blogId' itemprop='blogId'/>
    <meta expr:content='data:post.id' itemprop='postId'/>

    <a expr:name='data:post.id'/>
    <b:if cond='data:post.title'>
      <h3 class='post-title entry-title' itemprop='name'>
      <b:if cond='data:post.link'>
        <a expr:href='data:post.link'><data:post.title/></a><span> | </span>
              <span class='post-comment-link spk-title-comment'>
                 <b:if cond='data:blog.pageType != &quot;static_page&quot;'>
                      <b:include data='post' name='comment_count_picker'/>
                  </b:if>
              </span>
      <b:else/>
        <b:if cond='data:post.url'>
          <b:if cond='data:blog.url != data:post.url'>
            <a expr:href='data:post.url'><data:post.title/></a><span> | </span>
              <span class='post-comment-link spk-title-comment'>
                  <b:if cond='data:blog.pageType != &quot;static_page&quot;'>
                      <b:include data='post' name='comment_count_picker'/>
                  </b:if>
              </span>
          <b:else/>
            <data:post.title/><span> | </span>
              <span class='post-comment-link spk-title-comment'>
                  <b:if cond='data:blog.pageType != &quot;static_page&quot;'>
                      <b:include data='post' name='comment_count_picker'/>
                  </b:if>
              </span>
          </b:if>
        <b:else/>
          <data:post.title/><span> | </span>
              <span class='post-comment-link spk-title-comment'>
                  <b:if cond='data:blog.pageType != &quot;static_page&quot;'>
                      <b:include data='post' name='comment_count_picker'/>
                  </b:if>
              </span>
        </b:if>
      </b:if>
      </h3>
    </b:if>

That will be all. Happy trying :)
0

Show Post Title in Full in Magazine Blogger Dynamic View

Show Post Title in Full in Magazine Blogger Dynamic View

Before
After
I've published tutorials on how post titles can be shown in full in Blogger's Flipcard and Timeslide Dynamic Views before, and Blog Reader Pierre Egault would like to know a similar trick for Magazine view - as Magazine view tends to truncate your title when a custom web font is used. This tweak should also help to reduce the gap in your post title's line height when a custom font is used. So, here's how:

Go to Template Designer - Advanced - Add CSS - paste the following code - Press enter after the last character of the last line } - Apply to Blog
.magazine .item .title a{
line-height: 25px !important;
overflow: visible !important;
display: table !important;
}
.magazine #lead .item .title a{
line-height: 35px !important;
overflow: visible !important;
display: table !important;
}
0

Show Description Text in Full in Blogger Dynamic View Templates

Show Description Text in Full in Blogger Dynamic View Templates

Before
After

Happy 2014 folks! Enough with New Year greetings, and back to this week's post. Blog Reader Jerry De Luca was wondering if there is a way to make the description text in Dynamic View blogs to show in full. Yes, it can be done, and here's how.

Step 1:

First, you need to increase the size of your header.Go to Template Designer - Advanced - Add CSS - paste the following code - Press enter after the last character of the last line } - Apply to Blog.
#header .header-drawer.sticky, #header .header-drawer  {
top: 59px;
}
  
#header .header-bar{
height: 90px;
}
  
#header:hover .header-drawer, #header .header-drawer.open, .header-ssyby, body.viewitem-open #header .header-drawer {
top: 90px;
}
  
#header-container {
height: 130px;
}
  
.viewitem-panel .viewitem-inner {
top: 25px;
padding-bottom: 45px !important;
height: auto !important;
}
  
#header-container #header.header .header-bar span.title{
height: 90px;
}

Step 2:

Now that you have enough space in your header to add a new line for your description, go ahead and add the following to your CSS. Again, go to Template Designer - Advanced - Add CSS - paste the following code towards the bottom of the box (as in the code in Step 1 should appear on top of this code) - Press enter after the last character of the last line } - Apply to Blog.
#header.header div.header-bar span.title h3{
display: block !important;
}

#header .header-bar .title{
padding-top: 14px;
line-height: 30px !important;
margin-right: 0px !important;
}

Extra:

If you've got a really long line, use the following to force your description into a new line
#header.header div.header-bar span.title h3{
white-space: normal !important;
}
0

Finally a fix for Blogger Dynamic View Templates not Loading Properly

Finally a fix for Blogger Dynamic View Templates not Loading Properly


When Dynamic View templates were first introduced close to two years ago, we were awed by it's shiny design and the clean look that the templates gave us. Then we were slightly annoyed by the fact that they were not very much customisable. And then we realised that every now and then, the blog won't load in full - something I used to call the 'Ghost Template' - where only a single 'Subscribe' gadget is shown, and none of that tabs, comments and other stuffs. Turns out, Blogger included a timeout mechanism within the template itself to ensure a fast loading speed when your blog is rendered. If your contents are too large to be loaded within the defined timeout period, it'll just load a stripped down version of your full template.

Luckily, the good people at Global Nomads finally found a fix.
0

Animated Flying Twitter Bird Widget to Blogger Blogs

Animated Flying Twitter Bird Widget to Blogger Blogs

How to add Animated Flying Twitter Bird:.


1. Go to Blogger Dashboard > Design > Edit Html.
2. Now Search for </body> tag and Paste the Below Code Above it.
3. Save Your Template.


<script type="text/javascript" src="http://btsnts.googlecode.com/files/btsnts-tripleflap.js">
</script>
<script type="text/javascript">
var twitterAccount = "allworldbest";
var tweetThisText = " <data:blog.pageTitle/> : <data:blog.url/> ";
tripleflapInit();
</script><span style="font-size:11px;position:absolute;"><a title='Blogger Widget by AKS' href="http://everykindofhelp.blogspot.com" target='_blank'>Every Kind Of Help Help</a></span><!-- Twitter Bird Widget for Blogger by Altaf Khalti-->


Now Change My Twitter Username With Your Username That's It.Now You're Done
0

How to Be a Professional Blogger

Blogging today is one of the most entertaining things one can do to pass on their time. Depending on the traffic a blog receives, it can get rewarding too. This is an article which will tell you a few points on how to get professional with your blogs!


Step 1
Start fresh. Think before you start up a blog. Think about what you want to blog about. It should be about something you love talking about and know much about. Something fun and creative. Honestly speaking, no one will be interested on how you got through your day. People need help, they need entertainment, and you're going to give it to them


Step 2
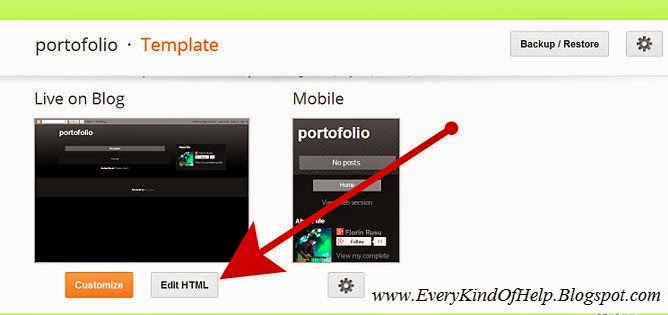
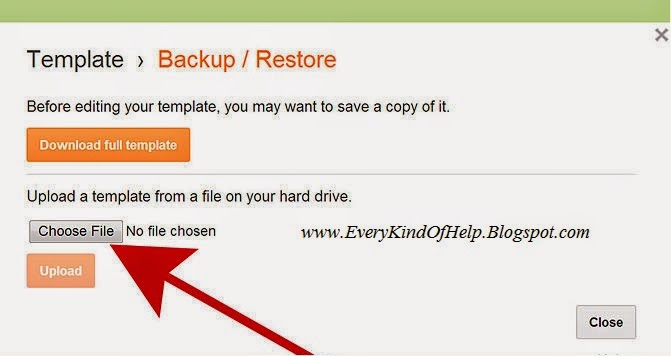
Make your blog good looking. Add up good looking templates. Hosts like WordPress and Blogger provide good looking templates which you can use to make your blog look attractive.

Step 3
Have fun. While you blog, make sure you are having fun. Don't blog with the intention of being bored or tired. If you get tired or frustrated quickly, blogging probably isn't for you.

Step 4
Blog regularly. It would be best if you could post a minimum of one post per day on your blog. People don't like to wait for days for new posts. Make sure you're a regular blogger. This will keep you viewers interested and come back for more and eventually follow the blog!
Step 5
Don't hide behind the curtain. At times talk to your audience about yourself. If it's about a car, talk to them about your experience. Also having an "About" navigation which will tell your audience about your blog is a very great idea


0

How To Change a Custom Blogger Template

This article will provide a step-by-step guide on how to correctly apply a new XML Blogger template to your blog. This process can be tricky depending on several factors (quality of the code in the new template, your existing widgets, etc) so you need to be careful when changing your template. Don’t worry though, just follow these step-by-step instructions below and we’ll hopefully get you through it without Much pain

Step 1
                             Sign in to your blogger blog and head to “design” => “Edit HTML”


Step 2
Before uploading new template backup your previous template


Step 3
Now browse your computer and select and upload your desired template.Step 4
After this process, blogger will ask whether to keep or delete your widgets. Take your choice (see screenshot).


Step 5
Now preview your blog and if everything is fine hit 'Save Template' button

Step 6
That's it, your new template is live now.

0

Found Copyrighted Content???